Cloudflare Workers 全面支持 Rust,其原理是使用 wasm_bindgen,先将 Rust 代码编译成 wasm,然后再在 CF 的环境中运行。
由于 wasm 环境本身是单线程的,因此我们平常用的 tokio,以及其中的许多工具方法(比如 spawn)等都不能用了。
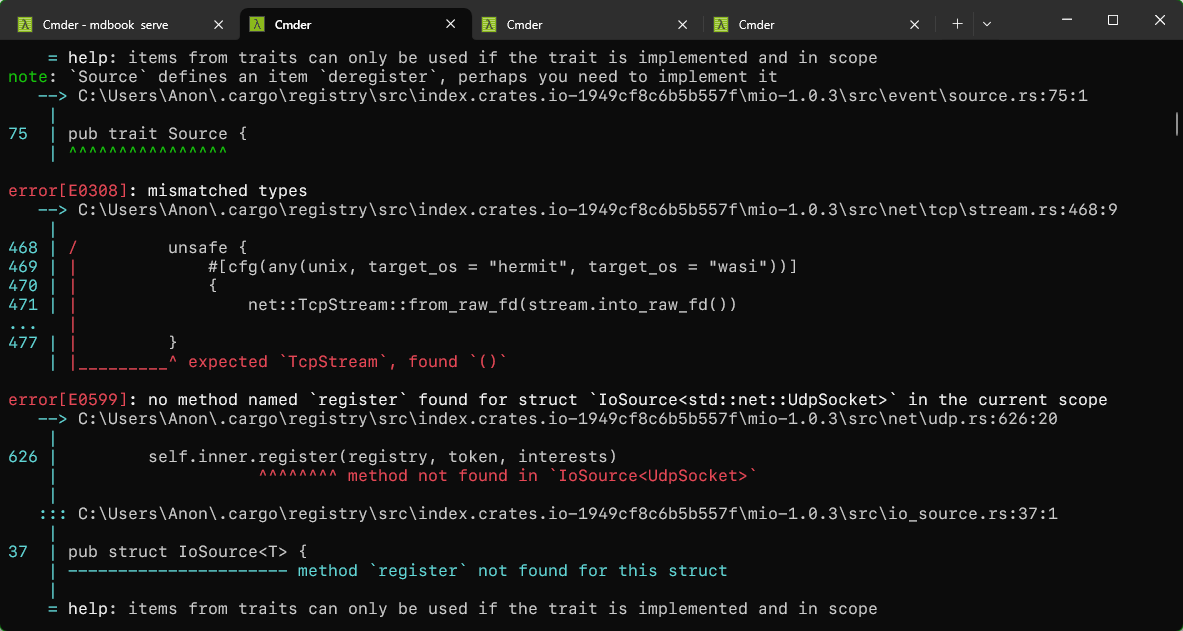
如果直接在 Cloudflare Workers 中使用 tokio 的话会报类似这样的错:
Cloudflare Workers 确实是提供了 Rust 开发的文档,但文档非常简略,其中的例子虽然有涉及到异步,但基本都是简单的在 async 函数中调用 await 这样的操作。并没有介绍用什么方法能做到类似 tokio 中那样,同时 spawn 几个异步函数,最后使用 join 统一收集结果的操作。
这篇文章试图弥补一部分这方面的空白。
使用 async/await
Cloudflare Workers 本身提供一个异步的执行环境(Future Executor),因此原生的 async/await 是可以自然使用的。
这也是官方文档中唯一介绍的方法,具体而言:
 1
 2
 3
 4
 5
 6
 7
 8
 9
10
11
12
13
14
15
16
17
18
19
20
21
22
23
24
25
26
27
28
29
30
31
32
33
34
35
36
37
38
39
40
41
42
|
use std::sync::Once;
use tracing::info;
use tracing_subscriber::fmt;
use tracing_subscriber_wasm::MakeConsoleWriter;
use worker::*;

static START: Once = Once::new();

#[event(fetch)]
async fn fetch(req: HttpRequest, _env: Env, _ctx: Context) -> anyhow::Result<Response> {
    console_error_panic_hook::set_once();
    START.call_once(|| {
        fmt()
            .with_writer(MakeConsoleWriter::default().map_trace_level_to(tracing::Level::DEBUG))
            .without_time()
            .init();
    });

    fut().await;
    fut2().await;

    Ok(Response::ok("ok")?)
}

async fn fut() -> String {
    let resp = reqwest::get("https://httpbin.org/status/400")
        .await
        .unwrap()
        .status()
        .to_string();
    info!("fut");
    resp
}
async fn fut2() -> String {
    let resp = reqwest::get("https://httpbin.org/status/500")
        .await
        .unwrap()
        .status()
        .to_string();
    info!("fut2");
    resp
}
|
输出:
1
2
|
 INFO test_workers: fut
 INFO test_workers: fut2
|
先执行 fut 然后执行 fut2,虽然用了 await 但还是同步操作,到这里还没什么特别的。
使用 futures 的 API
如果要一起 launch 两个 future,让它们同时开始执行,并且最后收集返回结果,只是简单的 await 就不行了。
在 tokio 里,我们可能会先用 tokio::spawn 启动两个异步任务,然后去 join 返回的两个 JoinHandle。
其实 spawn 也算是 tokio 提供的一种工具函数,目的是马上执行传入的 future。但这样的工具函数在 Cloudflare Workers 或者说 wasm 的环境中不存在。
我们需要做的是直接使用 futures 自己的 API 来编写异步代码。
简单情况:使用 futures::join!
简单情况可以直接使用 futures::join!。
其中 futures 是一个独立的 crate,需要先安装。
 1
 2
 3
 4
 5
 6
 7
 8
 9
10
11
12
13
14
15
16
17
18
19
20
21
22
23
24
25
26
27
28
29
30
31
32
33
34
35
36
37
38
39
40
41
42
43
44
45
|
use std::sync::Once;
use tracing::info;
use tracing_subscriber::fmt;
use tracing_subscriber_wasm::MakeConsoleWriter;
use worker::wasm_bindgen_futures::spawn_local;
use worker::*;

static START: Once = Once::new();

#[event(fetch)]
async fn fetch(req: HttpRequest, _env: Env, _ctx: Context) -> anyhow::Result<Response> {
    console_error_panic_hook::set_once();
    START.call_once(|| {
        fmt()
            .with_writer(MakeConsoleWriter::default().map_trace_level_to(tracing::Level::DEBUG))
            .without_time()
            .init();
    });

    let handle = fut();
    let handle2 = fut2();
    let tuple = futures::join!(handle, handle2);
    info!("{:#?}", tuple);

    Ok(Response::ok("ok")?)
}

async fn fut() -> String {
    let resp = reqwest::get("https://httpbin.org/status/400")
        .await
        .unwrap()
        .status()
        .to_string();
    info!("fut");
    resp
}
async fn fut2() -> String {
    let resp = reqwest::get("https://httpbin.org/status/500")
        .await
        .unwrap()
        .status()
        .to_string();
    info!("fut2");
    resp
}
|
输出结果:
1
2
3
4
5
6
7
|
INFO test_workers: fut2
 INFO test_workers: fut

 INFO test_workers: (
    "400 Bad Request",
    "500 Internal Server Error",
)
|
输出时间基本相当,确实是并行的。
数组的情况:使用 futures::future::join_all
如果 future 很多,是一个数组的话,就需要用到这种方法。
 1
 2
 3
 4
 5
 6
 7
 8
 9
10
11
12
13
14
15
16
17
18
19
20
21
22
23
24
25
26
27
28
29
30
31
32
33
34
35
36
37
38
39
40
41
42
43
44
45
46
47
|
use std::sync::Once;
use tracing::info;
use tracing_subscriber::fmt;
use tracing_subscriber_wasm::MakeConsoleWriter;
use worker::wasm_bindgen_futures::spawn_local;
use worker::*;

static START: Once = Once::new();

#[event(fetch)]
async fn fetch(req: HttpRequest, _env: Env, _ctx: Context) -> anyhow::Result<Response> {
    console_error_panic_hook::set_once();
    START.call_once(|| {
        fmt()
            .with_writer(MakeConsoleWriter::default().map_trace_level_to(tracing::Level::DEBUG))
            .without_time()
            .init();
    });

    let mut arr = vec![];
    for i in 1..5 {
        arr.push(fut());
    }
    let res = futures::future::join_all(arr).await;
    info!("{:#?}", res);

    Ok(Response::ok("ok")?)
}

async fn fut() -> String {
    let resp = reqwest::get("https://httpbin.org/status/400")
        .await
        .unwrap()
        .status()
        .to_string();
    info!("fut");
    resp
}
async fn fut2() -> String {
    let resp = reqwest::get("https://httpbin.org/status/500")
        .await
        .unwrap()
        .status()
        .to_string();
    info!("fut2");
    resp
}
|
输出:
 1
 2
 3
 4
 5
 6
 7
 8
 9
10
11
|
INFO test_workers: fut
 INFO test_workers: fut
 INFO test_workers: fut
 INFO test_workers: fut

 INFO test_workers: [
    "400 Bad Request",
    "400 Bad Request",
    "400 Bad Request",
    "400 Bad Request",
]
|
但有一个限制是 future 的类型必须要一致,如果不一致的话(如 fut 和 fut2),就会出错。例如我们把 fut2 也给 push 进去:
1
2
3
4
|
for i in 1..5 {
        arr.push(fut());
}
arr.push(fut2());
|
报错:
 1
 2
 3
 4
 5
 6
 7
 8
 9
10
11
12
13
14
15
|
error[E0308]: mismatched types
    --> src\lib.rs:24:14
     |
22   |         arr.push(fut());
     |         ---      ----- this argument has type `impl futures::Future<Output = std::string::String>`...
     |         |
     |         ... which causes `arr` to have type `Vec<impl futures::Future<Output = std::string::String>>`
23   |     }
24   |     arr.push(fut2());
     |         ---- ^^^^^^ expected future, found a different future
     |         |
     |         arguments to this method are incorrect
     |
     = help: consider `await`ing on both `Future`s
     = note: distinct uses of `impl Trait` result in different opaque types
|
限制并发数:使用 futures::stream::iter 配合 buffer_unordered
如果要限制并发数,在 tokio 中我们可能会使用 Semaphore 等,但在 wasm 环境中没有 Semaphore。
为此我们可以使用 futures 包 StreamExt 里面的 buffer_unordered。
代码如下:
 1
 2
 3
 4
 5
 6
 7
 8
 9
10
11
12
13
14
15
16
17
18
19
20
21
22
23
24
25
26
27
28
29
30
31
32
33
34
35
36
37
38
39
40
41
42
43
44
45
46
47
48
49
50
51
|
use futures::{FutureExt, StreamExt};
use std::sync::Once;
use tracing::info;
use tracing_subscriber::fmt;
use tracing_subscriber_wasm::MakeConsoleWriter;
use worker::wasm_bindgen_futures::spawn_local;
use worker::*;

static START: Once = Once::new();

#[event(fetch)]
async fn fetch(req: HttpRequest, _env: Env, _ctx: Context) -> anyhow::Result<Response> {
    console_error_panic_hook::set_once();
    START.call_once(|| {
        fmt()
            .with_writer(MakeConsoleWriter::default().map_trace_level_to(tracing::Level::DEBUG))
            .without_time()
            .init();
    });

    let mut arr = vec![];
    for i in 1..5 {
        arr.push(fut());
    }
    let res = futures::stream::iter(arr)
        .buffer_unordered(2) // 限制并发数为 2
        .collect::<Vec<_>>()
        .await;
    info!("{:#?}", res);

    Ok(Response::ok("ok")?)
}

async fn fut() -> String {
    let resp = reqwest::get("https://httpbin.org/status/400")
        .await
        .unwrap()
        .status()
        .to_string();
    info!("fut");
    resp
}
async fn fut2() -> String {
    let resp = reqwest::get("https://httpbin.org/status/500")
        .await
        .unwrap()
        .status()
        .to_string();
    info!("fut2");
    resp
}
|
输出:
 1
 2
 3
 4
 5
 6
 7
 8
 9
10
11
|
 INFO test_workers: fut
 INFO test_workers: fut
 INFO test_workers: fut
 INFO test_workers: fut

 INFO test_workers: [
    "400 Bad Request",
    "400 Bad Request",
    "400 Bad Request",
    "400 Bad Request",
]
|
这样的话每次最多有两个请求在执行。
关于 wasm_bindgen_futures::spawn_local
spawn_local 似乎是 wasm 提供的一种类似 tokio 中 spawn 的方法,目的是马上执行一个传入的 future。
示例代码如下:
 1
 2
 3
 4
 5
 6
 7
 8
 9
10
11
12
13
14
15
16
17
18
19
20
21
22
23
24
25
26
27
28
29
30
31
32
33
34
35
36
37
38
39
40
41
42
43
44
45
46
47
48
|
use futures::{FutureExt, StreamExt};
use std::sync::Once;
use tracing::info;
use tracing_subscriber::fmt;
use tracing_subscriber_wasm::MakeConsoleWriter;
use worker::wasm_bindgen_futures::spawn_local;
use worker::*;

static START: Once = Once::new();

#[event(fetch)]
async fn fetch(req: HttpRequest, _env: Env, _ctx: Context) -> anyhow::Result<Response> {
    console_error_panic_hook::set_once();
    START.call_once(|| {
        fmt()
            .with_writer(MakeConsoleWriter::default().map_trace_level_to(tracing::Level::DEBUG))
            .without_time()
            .init();
    });

    spawn_local(async {
        fut().await;
    });
    spawn_local(async {
        fut2().await;
    });

    Ok(Response::ok("ok")?)
}

async fn fut() -> String {
    let resp = reqwest::get("https://httpbin.org/status/400")
        .await
        .unwrap()
        .status()
        .to_string();
    info!("fut");
    resp
}
async fn fut2() -> String {
    let resp = reqwest::get("https://httpbin.org/status/500")
        .await
        .unwrap()
        .status()
        .to_string();
    info!("fut2");
    resp
}
|
但在测试过程中发现这些问题:
- 传入的 Future,Output 必须是 (),也就是没有返回值,这样的话就无法收集 future 的执行结果了;如果只是这样的话似乎还可以用 channel 等方式发送数据,关键是下面一个问题。
- 函数本身也没有返回值,没有一个 handle 可以 await,导致程序马上执行到 Ok(Response::ok(“ok”)?) 这一行就退出了,根本来不及等 future 跑完。
查看文档的过程中发现文档很简略,也没有例子。所以非常意义不明。
不过好在我们用 futures 包里面的工具就行了,也用不到这个方法。